Amazon

Monday, September 30, 2013

Chalkboard Message Board

12:00 AM 0 Comments


I am so into chalk board now and yes I painted another project using my can of paint. Plus I added in the mod podged chevron background.

I had purchased this chipboard items awhile ago and sort of forgot about them until this week when I thought I could go chalkboard that stuff, so I dug around in my craft closet and found them.

The circle and ring our my project while the crown is my daughters. She blinged it out after it was dry - such a girl sometimes.


So I painted the circle with the chalkboard paint and than I mod podged the chevron paper on to the ring (it is SU's Halloween paper).


When it was all dry, I hot glued on the circle to the ring- it wasn't that easy but I went slowly and it stuck.

So now I have a message board above my desk to write stuff on.

Friday, September 27, 2013

Scrapbook Fridays- Old Time County Fair

12:00 AM 0 Comments

This week's page is one where I decided to cram as many pictures on as I could. This seems to be the new trend of blocking lots of photos and I am way behind getting on that boat. I wanted a page to be a guide to all the things we did when we went to the Old Time County Fair.

I again used all SU products including the MDS. I was inspired by a few pages I saw on Pinterest so I used that to build the page.  I created the title using MDS and printed it up to fit with in the block theme of the page. I than punched a bunch of circles out with the intent to make them balloons but after I stuck them on, I decided I liked them without adding any strings.

This was a fun time with the family0 only one missing was the hubby because he had returned to Texas already. The grandparents loved having all three grandkids running around and Grandpa even sprang for a pony ride for each of them. My kids of course loved it while my niece was a little scared. She preferred the wooden horses they had.

Wednesday, September 25, 2013

Bow Ties are cool!

12:00 AM 0 Comments
I need a bow tie for my halloween costume or the idea I have in my head for what I want to be. I have been going through my stuff and I found some red fabric_ I needed my bow tie to be red. I pretty much just hand sewed it together. I used the iron lots to press it into place and than stitched it up real quick. I added some elastic for hen it goes around my neck. I promise to show off the finished costume if it works out like I want it to!


Tuesday, September 24, 2013

HSS #169

11:43 AM 5 Comments
In the card challenge mood today.

Over at HSS they had a fun designed and I used all sorts of Halloween stuff to make it. I used the washi tape and dsp from SU. I had these stickers I picked up and thought that Trick or Treat worked well.


colourQ #208

11:40 AM 3 Comments


This week's colourQ challenge was a unique one. We were tasked with using black, white and one spot color so I choose Cherry Cobbler. I embossed my black piece of cardstock with a notebook plate and went all retro with an original sizzix die I had when I first owned the press die cut machine like before I was married.


Monday, September 23, 2013

Spray Painted Mason Jars

12:00 AM 0 Comments


I love the look of the mason jar and than add some color and make it look vintage is by far an even better look. I have been seeing all over the place how to do them and it is super easy- just takes some drying time and in the Houston humidity a little more time.


Supplies

Mason Jar
Chalkboard spray paint
Red spray paint
Clear coat spray paint
Sand paper or sanding block


I took and sprayed the jar using the black chalk board paint. I did put two coats on. After it was completely dry which I let it sit over night, I sprayed it with the red paint - twice as well. Once that was dry, I than took a a sanding block and rubbed away at the top coat to reveal the black underneath to make it look vintage and aged. 

After that I sprayed it with two coats of the clear coat and between one, scolded my husband for touching it but he claimed it was dry. 

I love how it turned out and I actually made a few of them. One for myself, one as a present, and the kiddo convinced me to make her one as well for her pencils and such. 

Sunday, September 22, 2013

Friday, September 20, 2013

Fab Friday Sketch #27

9:19 AM 4 Comments


I love the sketch from Fab Friday this week.  I used some other paper than SU because the Halloween stuff I have is not purple and I wanted to do a purple Halloween card. Everything is just punched this week and no actually stamping. I might add a sentiment to the bottom but for right now I like it how it is.

Sketch Layout:


Scrapbook Page Friday- Door County

12:00 AM 2 Comments


I am starting a new feature this week on Friday's with a special Scrapbook page I have created. I am way way behind on scrapbooking and thought that maybe this will inspire me to catch up or at least get a handle on all the photos I do.

This week I am taking inspiration from a digital page I created way back in August for a sketch challenge.  I love that photo of my little girl and when I finally printed them and yes the photos have been sitting here for a few weeks, I thought I want to recreate that page in some way. I used slightly different colors because I had no basic grey in my stash of 12x12 which means I need to purchase some more.

I used all SU products and even used MDS to create the hybrid title that I stuck on the page with my new favorite font Dead Hardy. The page highlights our two day quick trip up to Door County to visit some great friends when we were back in Wisconsin for July. To be honest I hardly took any pictures of our adventure because we were having to much fun just socializing with the friends. Miss O crashed hard the first night and feel asleep in their big chair where Mr. L was still going with our one friend's boys. Those sweet sweet boys who tolerated a pesky three year old.


Wednesday, September 18, 2013

Organizing and Decluttering

12:00 AM 0 Comments
I started following this blog as well as the Facebook page called Mary Organizes and love her ideas about decluttering which I need to do more of. I am pretty organized and admit to some hot spots of disorganization in my house. Yes I know I am known for being neat, clean and organized so this might come to a shock to some that I do have areas where I hide my clutter.

On the blog there is a 91 day challenge to get your house in order. I am pretty good about it in the first place. The one big thing I need to declutter is the attic which is coming soon. I need my hubby to pull everything out and I need to go through and decide where it needs to go- trash, donate or storage.

We has a family have lots of stuff and it is hard to rid yourself of it often because you spent money, memories or you know once you get rid of it you will need it. I need to be better to use what I have and make do which isn't always something I am good at. I am way better than I was and I know if I go through stuff that I will feel even better.

Mary Organizes had a great blog post this past week about telling your kids to stop cleaning their rooms. She hit the nail on the head for me. I really don't nag the kids about picking things up because they understand if it gets left out, it might not get back to them. Both kids pretty much get up each day and make their beds. I have instilled in them that getting into a made bed will help them to get off to dream land better. I admit those few times I don't make the bed, I struggle with feeling comfortable. I was always that kid who made their bed.

My mom was a clean person and organized on the surface but when you would open things, you would cringe. My grandmother was clean but her clutter was every where. I vividly remember my Grandma picking clutter up, dusting and putting it right back down. So for each generation, it got better. My mom didn't like the clutter out and put it out of sight (she hardly does it now and has learned to live with less).

So for me, I like to have order and it does get out of hand on occasion. Example is the cabinet I am showing. It is my holiday dishes. I haven't used them the last few years because I just didn't want to deal with it and would just shove more in. I loved the child safety locks because that helped keep it contained.

The rest of my cabinets look like this:


Very neat and orderly. I stuck hooks up for lunch sacks and things are nicely stacked. 

I know everyone has seen my pantry as well and I still get people come over and sneak a peek. I keep it pretty nice all the time and on occasion it may get a little chaotic but usually ten minutes and it is back to being functional again. 


So here is my holiday dish cabinet:

Before


Yeah I know horrible and I hope it made you laugh at me. I laughed and than cried because I no idea how to begin with it. 

So I pulled everything out and made piles. 

Trash:


I hadn't used any of that for years and years. I didn't even know it was in there. So gone it was. 

Than I created a donation box which keeps getting bigger because I did my linen cabinet as well on Saturday and is sending a bunch of linens and stuff I don't use or don't even have a table for. 

So this is my donation pile:


I debated about all of it and decided I wan't going to use it. The cake thingy, I don't bake so why keep it. The pile of small Xmas dishes, I have so many already and there is no way I will only have a party of 12 people so they can find a new home. 

So after only about 30 minutes- yes that was all it took. I did think it was going to be this huge undertaking but it wasn't and I am ashamed I dreaded doing it for so long. 

This is the after. It isn't perfect but WAY easier to get into and I don't need the child locks to keep it all in. 

After


Tuesday, September 17, 2013

Monday, September 16, 2013

Welcome Sign

12:00 AM 0 Comments


I have been stalking this on item on Pinterest and so have been wanting to make it for myself. I was going to go buy all the parts and than I stubbed my toe in the garage with a left over piece of wood from the kids play structure and when I picked it up to move it, I realized it was the perfect piece for the project.

So I used:

1- 24 inch 4x4
1- 6x6 beveled plaque (from Hobby Lobby)
1- 4x4 beveled plaque
1-3x3 beveled plaque
1- black hook
1 chalkboard sign

So because I had the large piece, all the other parts cost me about 10 bucks. Each of the wood pieces were about 1/50 a piece and than the chalkboard sign was 5.99 but I had my 40% off coupon and the hook was also on sale for 1.50.

I had my hubby nail the plaques onto the bottom and the top. I than painted it with one coat of paint (I wanted the weathered unfinished look) and than the hubby screwed in the hook for me.

I than had decorated using left over burlap ribbon to make some rosettes. I decided on the chalkboard sign so I could change out the message and the rosettes are hot glued on, so I can just pop them off to change them out.

I love my sign hanger and I could also hang a small wreath from it as well.

Sunday, September 15, 2013

Unscripted #222

8:04 AM 4 Comments
Another Halloween card using this week's Unscripted sketch.  I love Halloween and I figure use the sketches, and create my cards to send out. I love making unique cards for everyone so they get a piece of my art.

Here i the sketch for this week.


Here is my creation. I used all SU products- 
Pumpkin Pie CS
Basic Black CS
Witches Brew DSP 
Halloween Bingo
Bat punch (retired)

The Sweet Stop #228

7:47 AM 2 Comments
So this week's Sweet Stop's challenge screamed Halloween for me so I pulled out the Halloween Bingo  set from SU and used the basic pumpkin pie and basic black card stock as well as the current DSP Witches Brew to create a fun card. I think I might be using a version of this for my overall Halloween cards I send out every year.

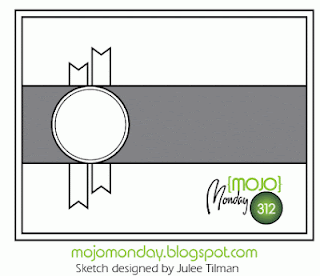
Here is the sketch layout:


colourQ #206

7:15 AM 1 Comments
I have been in a funk the last few weeks and unsure what to create. I have been wanting to create but even the inspiration isn't giving that spark I need. I think a lot of it has to do with school starting and a whole new routine because the youngest is now in preschool.

So when I had a moment to take a look at this week's colourQ challenge , I thought wait didn't I just take a photo that would work with these colors! So I dug around and decided to create a digital page using a picture I just took down in Galveston, Texas of the Landry's Pleasure Pier. The sun was setting and all sorts of pinks were in the sky and with the carnival lights shining bright, I just snapped a quick picture.

Here are this week's colors to inspire:


Here is my creation page. For me the only thing missing was fireworks in the sky so I added that element to the page. 


Wednesday, September 11, 2013

September Pumpkin Challenge

11:07 AM 3 Comments


I made this card a few weeks ago and I thought wow this really works for the My Pumpkin's September challenge so here it is.

I created a basic card background using the MDS for the rainbow effect and than I stamped the coordinating colors with the "Thanks' stamp from the Paper Pumpkin kit. As much as I love the little bike, I love the banner stamp as much.

I really like how this card turned out and I plan in using it for one of my swaps at some point because it is simple and dynamic in my book.


Tuesday, September 10, 2013

Monday, September 9, 2013

Fall Mantel

12:00 AM 2 Comments

Fall is in the air for my house even though it is Texas and still warm- heck it is warm all the time. Fall and winter are about five minutes sometime in January. 

Along with redoing my mantel shelf, I created a fun and cheap wreath. I think total cost is under 5 bucks. 

Everything else on my shelf is from around the house. 


Friday, September 6, 2013

Open Face Rueben Casserole

12:00 AM 0 Comments


I don't know if this is truly a Pinterest fail but I liked it the kids and hubby not so much. The one thing I would do different is layer another row of crescent dough.

I took one can of crescent dough and laid it in the bottom of a casserole dish I sprayed with cooking spray. 

I than drained and squeezed out any excess liquid out of one can of sour kraut.  I spread it across the crescent dough base.

I than put nearly a whole bottle of thousand island dressing over that. 

Taking deli corn beef, I layered than next (I used about three packages) and than topped it all with about two cups of shredded swiss cheese. 

I baked it for 30 minutes at 350 until the cheese  started to bubble and brown. I of course served it with a bowl of homemade french onion soup.

I liked it but the family not so much. I don't know what else I could change, maybe less thousand island dressing. This reminded me of a dish my parents would make years ago when they adult parties which was pretty much the same thing. 

If you try it, let me know what you think. I would curious to see how a real corn beef would be on it and more crescent dough. 


Tuesday, September 3, 2013

Monday, September 2, 2013

Burlap Fall Banner

12:00 AM 2 Comments


I LOVE fall and fully admit to it being my most favorite time of the year. So much is happening with the season change which really doesn't happen till like December here in Texas to all sorts of intoxicating fall scents with pies, and drinks to name just a few. I am sad to leave summer because the kids and I have a blast but fall is all about sports, school, and Halloween!

I created a burlap banner to hang on my mantel shelf and of course it will all be decked out in fallesque attire. 


Sunday, September 1, 2013